
クライアントって何それおいしいの?→ ...Twitterクライアントとは
なにはともあれ、gmailのアカウントを持っていることが前提です。
あとはtwitterはいつものようにログインした状態で設定していきます。
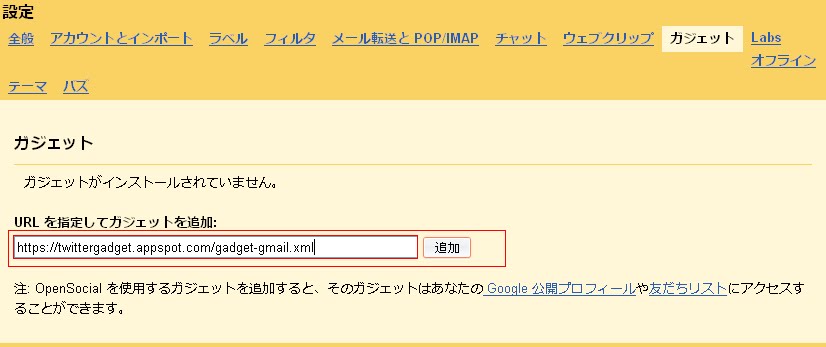
まずはgmailにログインして右上にある、設定をクリックします。

次は設定の中のLabsを選択します。

Labsの中段辺りにあるURLでガジェットを追加を有効にするにチェックを入れて変更を保存します。


次に、Labsの隣りにあるガジェットを選び、以下のURLをコピペして”追加する”を押します。
https://twittergadget.appspot.com/gadget-gmail.xml
追加すると、左下の方にtwitterという枠ができてきます。
その中の文章にhereというリンクがありますのでそれをクリックしてください。
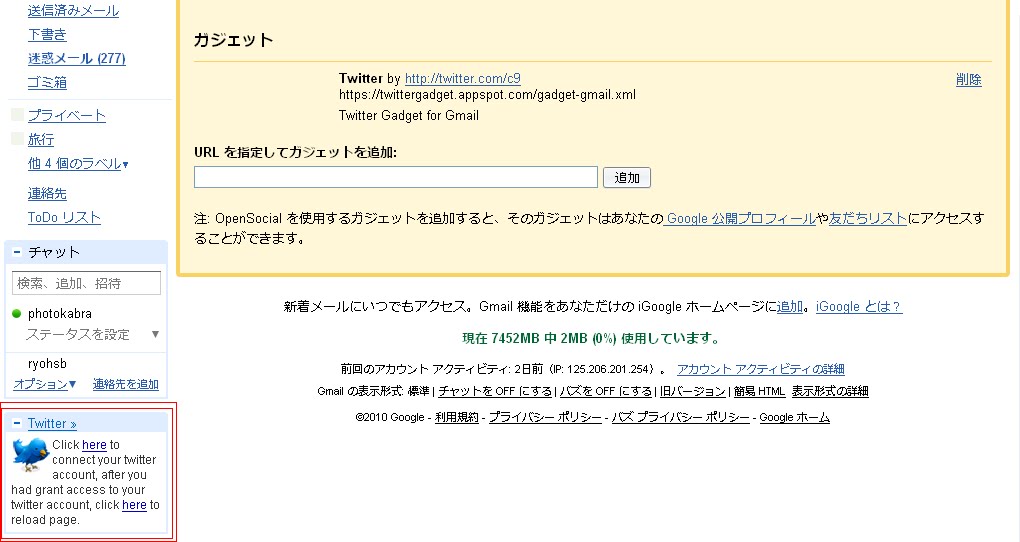
クリックするとtwitterのOach認証の画面に飛びますので、ここで許可するを選択します。

以下の画面が表示されたら、そのウィンドウを閉じてgmailに戻ります。
gmail戻ると、先ほどの左下のTwitterの枠に自分のアカウントが表示されているはずです。その状態でつぶやきを入れてupdateボタンを押すことによりつぶやきを送信ができます。

更にTwitter >>を押すとメールボックスの欄にタイムラインを表示できます。

@, DM, Favorities, Retweet, List, Searchなども見ることができ、かなりの高機能です。仕事中などの出先でTwitterを表示したい時に手間が省けて便利だと思います。
参考にしたサイト:


0 件のコメント:
コメントを投稿